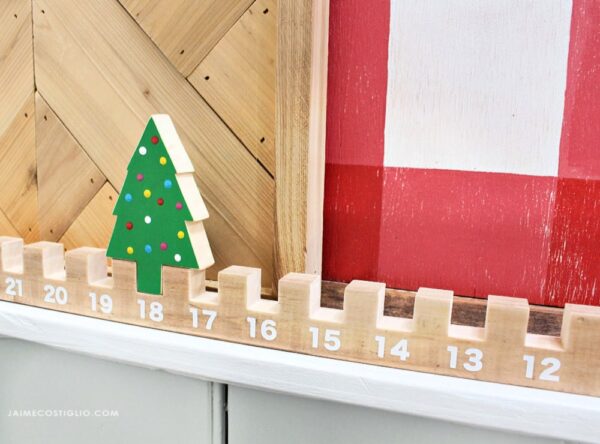
Crafting a Charming Wooden Christmas Countdown Calendar
Get ready to spread holiday cheer with a handmade Christmas countdown calendar! This charming project will add a touch of rustic elegance to your home and create a fun, interactive way to count down the days until Christmas. Let's dive into the details and bring this festive creation to life.
Gather Your Materials
Before you begin, make sure you have all the necessary materials. You'll need:
- A piece of plywood or MDF board (at least 1/2 inch thick)
- Wood glue
- Saw (jigsaw or hand saw)
- Sandpaper (various grits)
- Paint or stain (optional)
- 24 small wooden boxes or drawers (you can find these at craft stores or online)
- Small treats or trinkets to fill the boxes (consider candies, small toys, or even handwritten notes)
- Numbers 1-24 (you can use stencils, paint them on, or buy pre-made wooden numbers)
- Decorative elements (ribbon, twine, holly sprigs, etc.)
Designing Your Countdown Calendar
Start by sketching out your desired design on paper. Consider the size and shape of your calendar, the arrangement of the boxes, and any additional elements you want to incorporate. You can opt for a traditional rectangular shape or get creative with a tree, house, or other festive forms.
Cutting the Base
Once you've finalized your design, cut the plywood or MDF board to the desired size using a saw. If your design is intricate, use a jigsaw for precise cuts.
Creating the Box Arrangement
Measure and mark the placement of your boxes on the base. Use a pencil to outline each box's position. Depending on your design, you can arrange them in a line, a spiral, or a more intricate pattern.
Assembling the Boxes
Secure the boxes to the base using wood glue. Make sure the glue is evenly distributed and press the boxes firmly in place for a strong bond. Allow the glue to dry completely before moving on.
Adding the Finishing Touches
Now it's time to personalize your calendar! Here are a few ideas:
- Paint or Stain: Give your calendar a fresh look by painting it a festive color or staining it for a natural wood finish. Use a brush for even application and let it dry thoroughly.
- Numbers: Attach the numbers 1-24 to the boxes using wood glue or small nails. Arrange them in a way that complements your design.
- Decorations: Embrace the spirit of Christmas with decorative touches! Wrap the calendar with ribbon or twine, add sprigs of holly, or attach small ornaments for a whimsical touch.
Filling the Boxes with Festive Surprises
The most exciting part is filling the boxes with treats and surprises! Get creative and personalize the gifts for each day. Consider small candies, toys, holiday-themed trinkets, or even handwritten notes with special messages for each recipient. The anticipation and excitement of opening a box each day will add to the magic of the season.
Enjoy Your Countdown Calendar
Congratulations! You've created a unique and charming wooden Christmas countdown calendar. Place it prominently in your home and watch as the days dwindle down to Christmas. Each day, open a box and enjoy the surprise within. This handmade calendar is a perfect reminder of the approaching holiday and a testament to your creativity and love for the festive season.


0 comments:
Post a Comment
Note: Only a member of this blog may post a comment.