


Build Your Own Furniture Dolly: A Step-by-Step Guide
Hey there, DIY enthusiasts! Ever wrestled a bulky armoire across the room, muttering about the need for a furniture dolly? Yeah, me too. That's why I decided to build my own. And guess what? It was easier than I thought! This guide will walk you through building a sturdy, versatile furniture dolly perfect for your home or workshop. We'll cover everything from choosing the right materials to adding those finishing touches. Let's get started!

Choosing Your Materials: The Foundation of a Great Dolly
Before you even think about picking up a saw, let's talk materials. The beauty of this project is that you can adapt it to what you have on hand, or easily source materials from your local hardware store. Here's what you'll generally need:
The Wood: Strength and Stability
For the base, I recommend using sturdy plywood. ¾ inch plywood is a great option; it's strong enough to handle heavy loads without being overly bulky. You could also use dimensional lumber (like 2x4s) for extra strength, but plywood is generally easier to work with for this particular project. You'll need enough to create a rectangular platform, the size of which depends on the biggest piece of furniture you intend to move. Think about your largest sofa or chest of drawers. Add a couple of inches to each dimension to be safe.
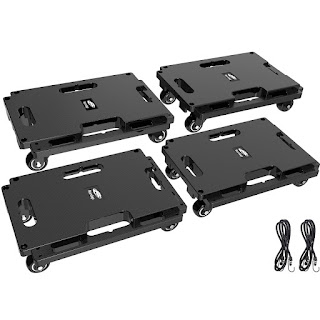
The Wheels: Smooth Sailing
This is where things get fun! You've got options. You can find heavy-duty caster wheels at most hardware stores. These are typically rated for weight capacity, so make sure you select ones that can handle the weight of the heaviest furniture you plan to move. Consider the type of wheel too: swivel casters allow for easy maneuvering, while rigid casters are good for straight-line movement. A mix of both is ideal for maximum versatility. The diameter of the wheel is also important, larger wheels are better for navigating uneven surfaces, while smaller wheels are great for smoother surfaces.
The Fasteners: Holding it All Together
You'll need screws to attach the wheels to the platform, and potentially some wood glue for added strength. Use screws that are long enough to penetrate the plywood and the caster plate securely, without coming out the other side. Wood glue will help create a stronger bond, preventing the screws from loosening over time.
Optional Extras
Depending on your needs and your furniture, you may want to consider these extras:
- Rubber padding: Protect your furniture from scratches by adding rubber pads or felt to the top of the dolly.
- Handles: For easier maneuvering, consider adding some handles to the sides of the dolly.
- Paint or stain: Give your dolly a nice finish that matches your workshop or home aesthetic.
Building Your Furniture Dolly: A Step-by-Step Guide
Now for the fun part! Let's assemble this baby.
Step 1: Cut the Plywood
Measure and cut your plywood to the desired dimensions. Remember, accurate measurements are crucial here! Use a saw (circular saw, jigsaw, or even a hand saw if you're feeling ambitious) to make clean cuts.
Step 2: Attach the Caster Wheels
This is where you'll need your caster wheels and screws. Position the casters on the corners of the plywood platform, ensuring they are evenly spaced. Pre-drill pilot holes to prevent the wood from splitting, then securely attach them using the appropriate screws. A little wood glue in the screw holes will add extra holding power.
Step 3: (Optional) Add Rubber Padding or Handles
If you decided to include rubber padding or handles, now's the time to attach them. Use appropriate adhesive for the padding, and screws for the handles. Ensure they are securely attached before moving on.
Step 4: (Optional) Apply a Finish
Once everything is securely attached and dried, you can sand down any rough edges and then apply your chosen finish (paint or stain). This step is purely aesthetic but adds a nice touch.
Step 5: Test it Out!
Before you move your precious antique armoire, test the dolly with something lighter. Make sure the wheels roll smoothly and that the dolly is stable enough to support the weight. Adjust as needed.
Tips for Success
Here are a few tips to help you build the best furniture dolly ever:
- Measure twice, cut once: Accurate measurements are essential for a stable and functional dolly.
- Use appropriate safety gear: Safety glasses and hearing protection are always recommended when using power tools.
- Don't overload the dolly: Always stay within the weight capacity of your chosen wheels.
- Consider the surface: If you frequently move furniture on uneven surfaces, larger wheels will make the process smoother.
Beyond the Basics: Advanced Dolly Designs
Feeling ambitious? You can easily customize your dolly design. Consider building a platform with slightly raised edges to prevent furniture from sliding off. Or add a more robust frame using 2x4s for heavier loads. The sky's the limit!
Frequently Asked Questions
Here are some common questions I get about building furniture dollies:
- Q: What type of wood is best for a furniture dolly? A: ¾ inch plywood is a great all-around option. For heavier loads, consider using dimensional lumber (2x4s) as a frame.
- Q: How much weight can my dolly hold? A: The weight capacity depends on the wheels you choose. Always check the manufacturer's specifications for your casters.
- Q: Can I use this dolly for outdoor use? A: While it's possible, consider using weather-resistant materials and a protective finish if you plan on using it outdoors regularly.
- Q: What if my wheels get stuck? A: Ensure the wheels are appropriately lubricated and are not obstructed by debris or uneven surfaces.
- Q: How do I clean my furniture dolly? A: Simply wipe it down with a damp cloth. Avoid using harsh chemicals that could damage the wood or finish.
And there you have it! Your very own homemade furniture dolly. Building it is incredibly rewarding, and you'll appreciate its convenience every time you need to move furniture. Happy building!


0 comments:
Post a Comment
Note: Only a member of this blog may post a comment.