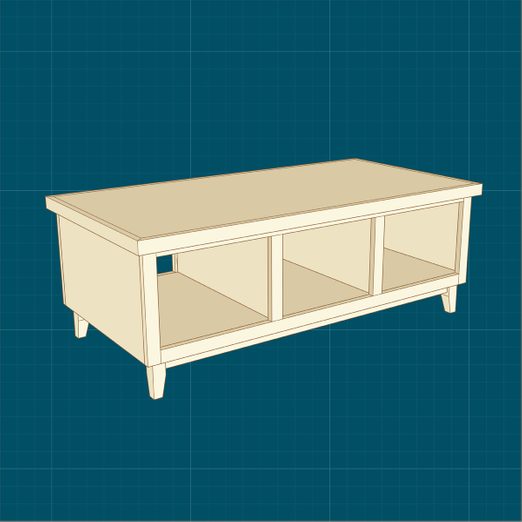
Building Custom Coffee Tables with Magazine and Book Storage
Elevate your living room with a coffee table that's as functional as it is stylish. Building a custom coffee table with storage for magazines and books allows you to create a piece that perfectly complements your space and your needs. This guide will walk you through the entire process, from initial design to finishing touches, so you can create a coffee table that's truly one-of-a-kind.
Planning Your Coffee Table
Before you start building, it's crucial to plan out your design. Consider the following:
Size and Shape
Measure the space where your coffee table will go to determine the ideal size and shape. You can opt for a traditional rectangular or square coffee table, or get creative with a circular or oval design.
Storage Needs
Think about how you'll use the storage. Do you need open shelves for magazines and books, or closed drawers for more discreet storage? Consider the amount of storage you need and how accessible it should be.
Style and Materials
Choose a style that complements your living room decor. You can opt for a sleek modern design, a rustic farmhouse style, or a classic traditional look. Select materials that match your aesthetic and budget, such as wood, metal, or a combination of both.
Gather Your Tools and Materials
Once you have your design finalized, gather the necessary tools and materials. You'll need:
- Wood for the table top, legs, and storage compartments
- Wood glue
- Screws and nails
- Clamps
- Saw (circular saw, miter saw, or hand saw)
- Drill
- Sandpaper
- Wood stain or paint (optional)
- Finishing oil or sealant (optional)
- Measuring tape
- Level
- Pencil
Depending on your chosen storage design, you may also need:
- Drawer slides
- Drawer fronts
- Hinges for doors
- Hardware for shelves or doors
Constructing the Coffee Table Frame
Start by building the frame of your coffee table. This will form the base for the tabletop and storage compartments:
- Cut the wood for the frame. Use your saw to cut the pieces for the sides, top, and bottom of the frame according to your measurements.
- Assemble the frame. Join the pieces together using wood glue and screws or nails. Make sure to clamp the pieces securely while the glue dries.
- Reinforce the frame. Add additional support pieces to the frame, such as crossbars, for added stability, especially if you're planning on having heavy storage.
Creating Storage Compartments
Next, create the storage compartments within the frame. This will vary depending on your design choices:
Open Shelves
For open shelves, simply cut pieces of wood to fit the desired shelf dimensions and attach them to the inside of the frame using screws or nails.
Closed Drawers
For closed drawers, build boxes using wood panels and attach drawer slides to the sides of the boxes. Install the drawer slides to the frame and attach the drawer fronts to the boxes.
Doors
For doors, cut and assemble panels for the doors and attach hinges to the frame and doors. You can add handles or knobs for easy opening and closing.
Adding the Tabletop
Once the storage compartments are complete, attach the tabletop to the frame. You can use wood glue and screws or nails for a secure fit. Make sure the tabletop is level and flush with the frame.
Finishing Touches
Finally, give your coffee table the finishing touches:
- Sand the table. Sand all surfaces of the coffee table with sandpaper to smooth out any rough edges and prepare for staining or painting. Start with coarse-grit sandpaper and gradually move to finer grits.
- Apply stain or paint (optional). Stain or paint the coffee table according to your desired finish. Let the stain or paint dry completely before applying sealant.
- Apply sealant (optional). Apply a sealant to protect the wood and enhance its durability. Polyurethane is a popular choice for coffee tables.
Enjoy your newly built coffee table that adds style and storage to your living room. You can personalize it further by adding decorative elements, such as hardware or trim, to create a truly unique and personalized piece.


0 comments:
Post a Comment
Note: Only a member of this blog may post a comment.